How to Hike to the Base of Torres del Paine (Mirador las Torres)
One of the main reasons that people travel to Torres del Paine National Park is to hike to one of the world’s most iconic views.
This guide will detail my experience hiking to the base of Torres del Paine (Mirador las Torres), including what to know before you go, how to book a guided hike (like I did), and why I think this is a can’t-miss experience!
Quick Puerto Natales Travel Guide
If you’re traveling to Puerto Natales last minute, be sure you have hotels and tours booked ahead of time. Below are some of my top picks:
🇨🇱 Best tours and activities in Puerto Natales:
- Base of the towers group trek (reviewed below – a must-do!)
- Full-day Torres del Paine highlights tour (my top pick for seeing the best of the park)
- Glacier boat tour from Puerto Natales (fabulous group tour!)
🛌 Top hotels and lodging in Puerto Natales:
- Cabañas Última Esperanza (this is where I stayed and recommend!)
- AKA Patagonia (private, modern, & upscale lodging)
- Hostal Nataly (great budget option in the center)
🚗 Planning to travel around Chile independently? Find and compare the cheapest rental car rates here!
If I missed anything you’d like to know about the Mirador las Torres hike (Mirador Torres hike as it is also called), please let me know in the comments. Thanks!
📝 Megan’s Notes
This guide was written by my partner, Ed, who helps out with a lot of the content on this blog. I aspire to do this hike one day, but it’s not in the cards just yet!
Base of Torres del Paine Hike – Overview
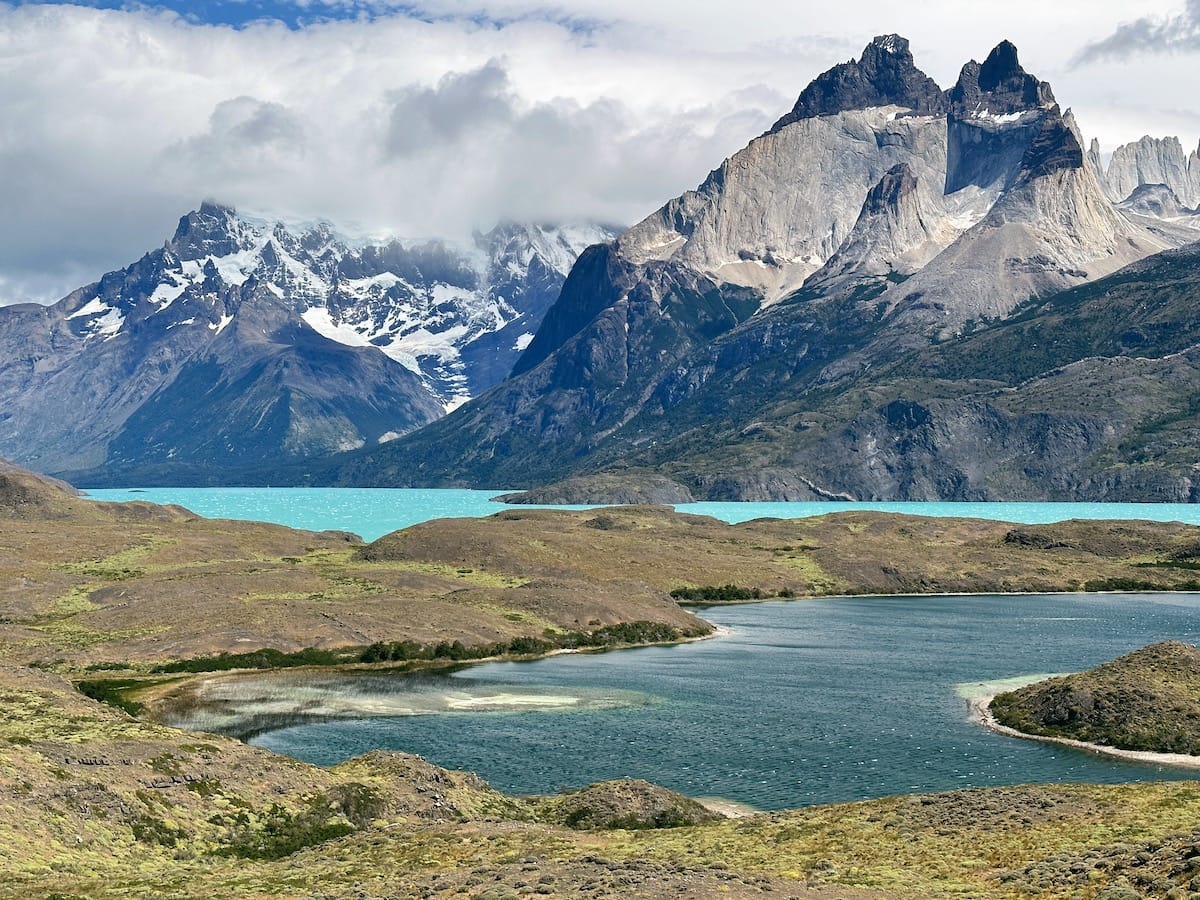
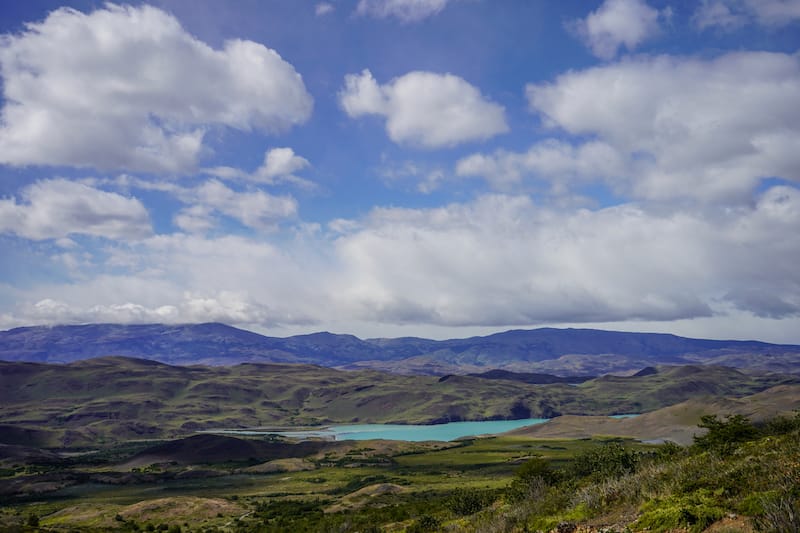
Torres del Paine National Park is centered around the Cordillera Paine mountain range and its three famous granite towers that make up the peak.
These views dominate the park and surrounding areas and leave a lasting impression; however, nothing beats seeing them up close with the glacial lake that sits below. The only way to get this view is by completing the strenuous hike to the base of the towers.
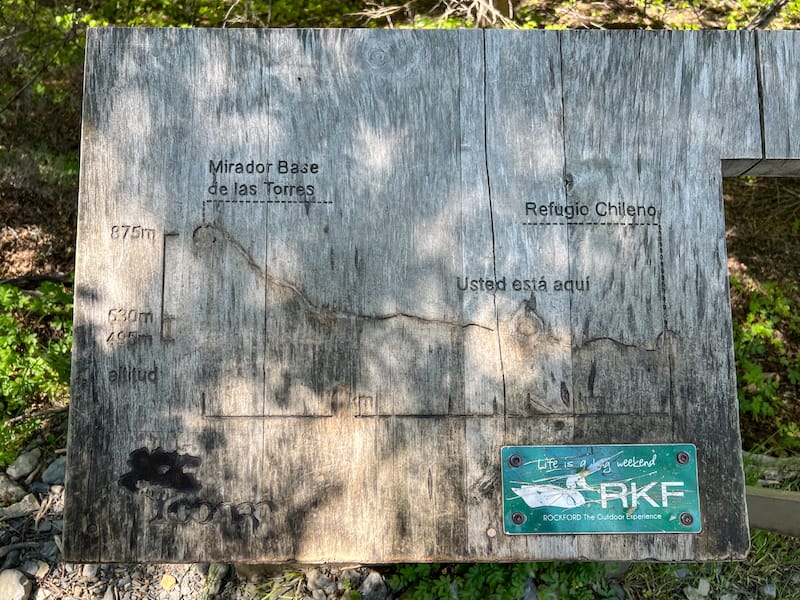
The day hike that I did is an 18 km (11.18 mi) round-trip one that takes you up into areas of the park that can only be reached by foot and through some of the world’s most insane scenery.
The hike rises to an elevation of 901 m (2956 ft), although the most grueling part of the elevation is the final 400m (1313 ft), which you will do over a 1 km (0.62 mi) section of the hike.
At the top, you will be rewarded with one of the most spectacular views in the world. In total, you will spend around 8 hours hiking the trail.
If you are planning to do the W trek or the O trek, you do not need to do a separate day hike to the Torres del Paine, as it is included in both treks.
In my guide, I will tell you about my experience in-depth as well as answer frequently asked questions about the day hike to Torres del Paine at the end of the guide.
I will also give you some advice on what to bring, what to wear, and how the day goes if you book a guided tour. But before I answer that, I am going to get right into my experience on this hike
Option 1: Base of Torres del Paine Day Hike (from Puerto Natales)
Duration: 10-12 hours (it ended up around 15 hours)
Difficulty: Hard
Meeting Point: pre-arranged pick-up in Puerto Natales
Language: English, Spanish
🥾 CLICK HERE TO BOOK A GUIDED HIKE
When I visited Puerto Natales, I chose not to rent a car, knowing I would be doing some tours, and it felt like the easiest way to do all the activities I wanted to do.
The tour made everything a little bit easier, knowing you would be guided up the mountain in a larger group and would not have to worry about driving to and from the park.
I was incredibly thankful that on the drive back to Puerto Natales, I was able to sleep a little bit.
Base of Torres del Paine Itinerary
The hike is a set route, and every group will follow the set route. On my tour, we had three guides spread across the 27 people who joined the hike.
One led the group at the front, choosing where to stop; one followed in the middle; and the third kept pace with those at the back of the group.
Pick-up
You will be picked up at a pre-arranged time outside your accommodation. Try to be on time, as it is a fairly long drive from Puerto Natales to Torres del Paine.
Once I was picked up, we headed out to the accommodations owned by the tour provider to pick up a larger group of people who were setting off to complete the O and W treks.
At the hotel, we split into different buses and started our drive to Torres del Paine. On the way to the park, keep an eye out for wildlife, with the chance to see guanacos, Darwin’s rhea, and, if you are very lucky, pumas.
Entering the Park
When you reach the park, you will need to get out and show your park ticket or purchase one.
Ideally, you would have purchased this before arriving at the park, as it can cause delays in starting the hike for everyone if the group needs to wait for those buying tickets.
At the entrance, there are also toilet blocks, which I advise using as there are not many facilities along the way. From the entrance, you will drive to Hotel Las Torres, where the hike officially starts.
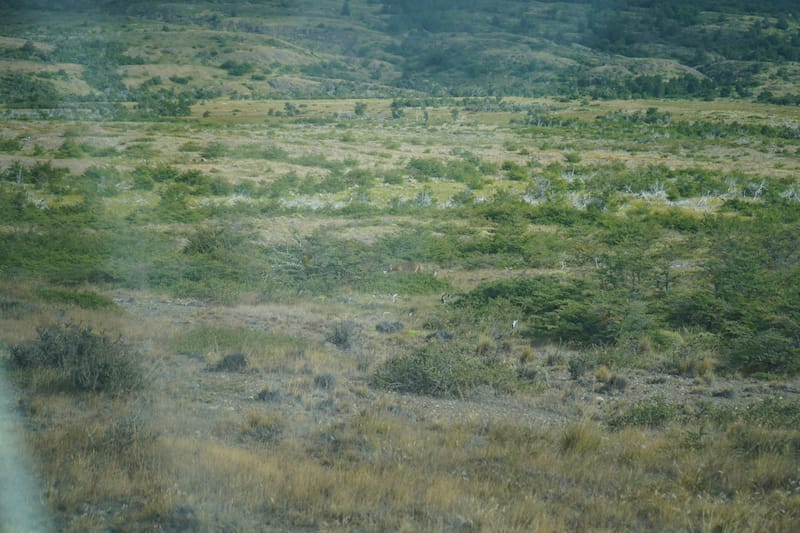
On the way to the starting point, we were very lucky to see a puma stalking through the bushes.
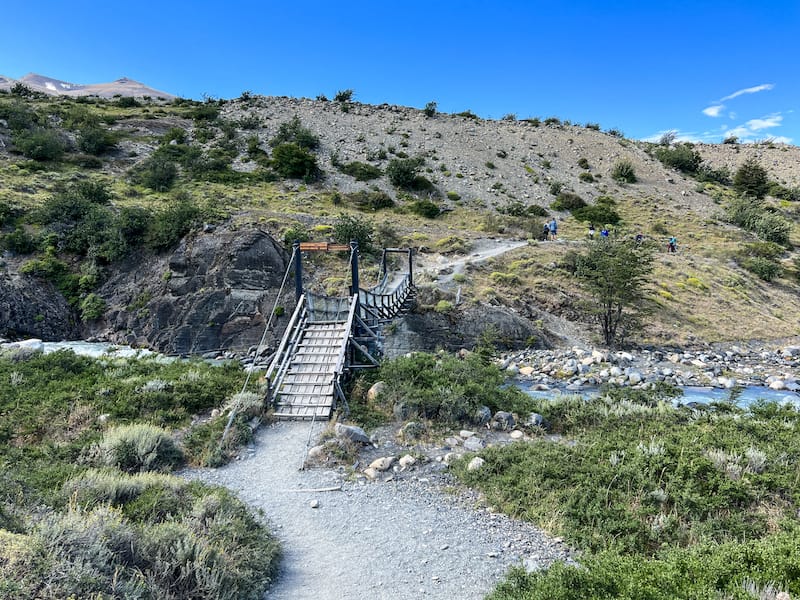
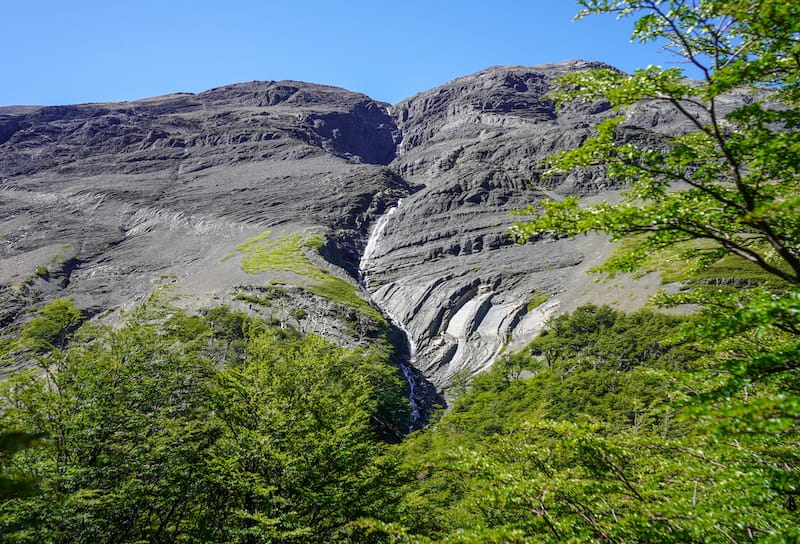
First Section of The Hike
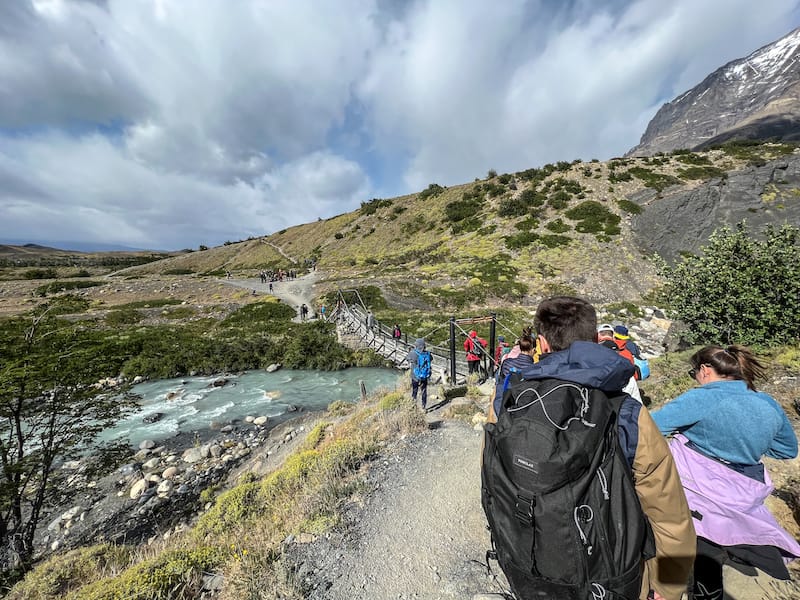
The hike truly starts after you cross a swing bridge. The bridge tends to be the first bottleneck of the hike, as it can only be crossed two at a time.
You can end up waiting here for a while, which is why it is so important that delays are not caused before reaching the park. From that point, you start your first incline of the hike.
This is the longest incline of the hike but spread over a fair distance, it will lull you into a false sense of security about just how difficult the hike is. Once you reach the top of the incline, the guides will gather everyone up for a short break.
At this point, they will teach you to deal with the final part of the first section of the hike, the windy passage. It is important to take note of this point, as you will need to learn how to use your hiking poles to keep yourself safe from gusts of wind.
The windy passage is pretty challenging and not for the faint-hearted, as there is a lot of wind and a big drop-off on one side.
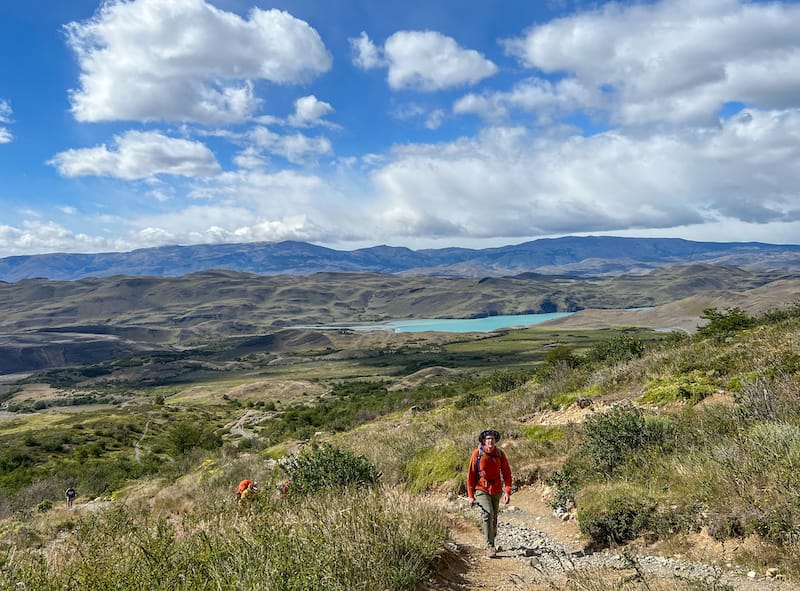
Second Section of The Hike
After completing the windy passage, you will head down into the valley and stop off at a refuge for a short break. Here you can buy food and drinks, go to the restrooms, or sit at a table and rest.
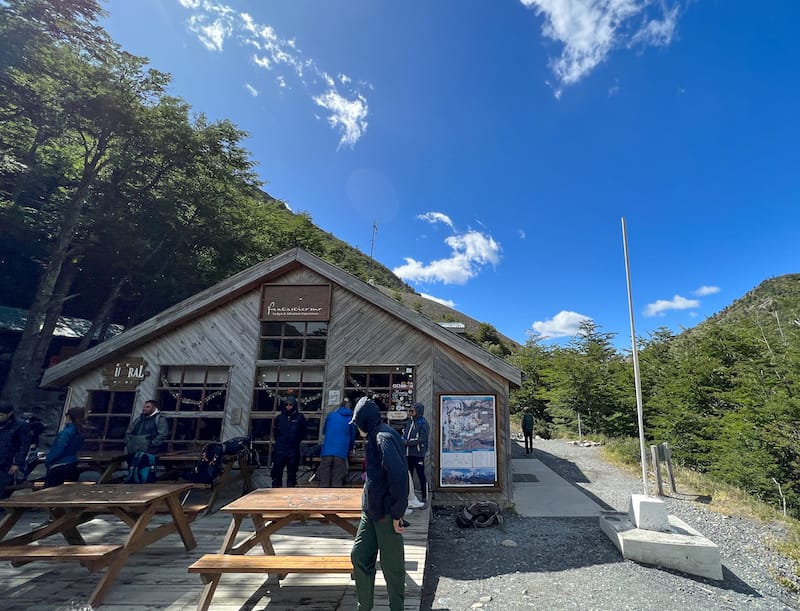
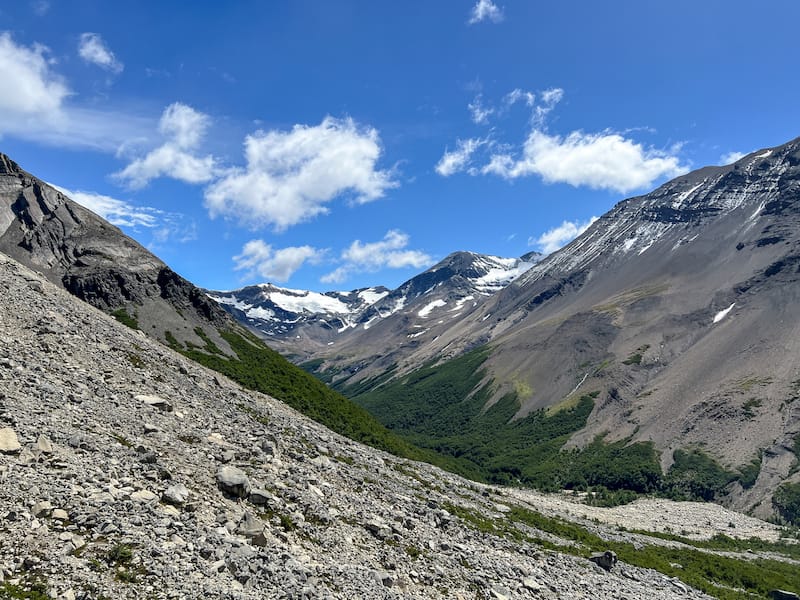
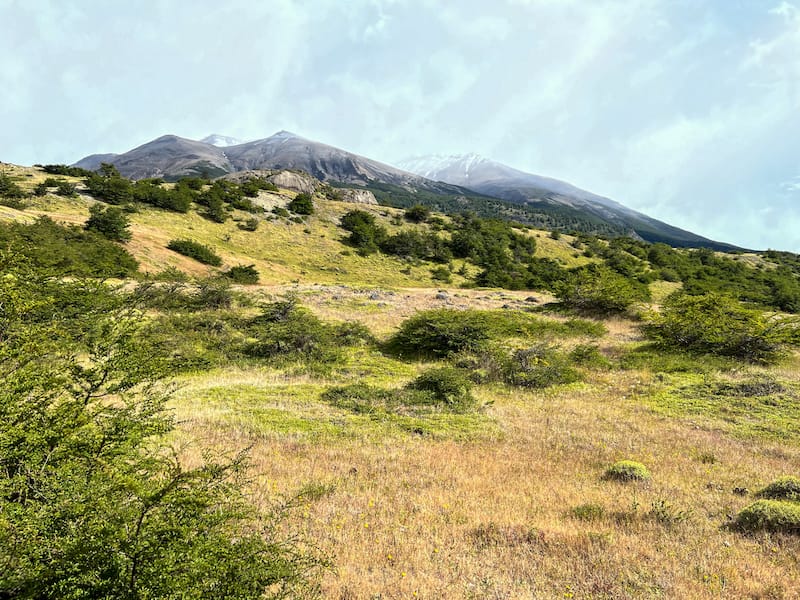
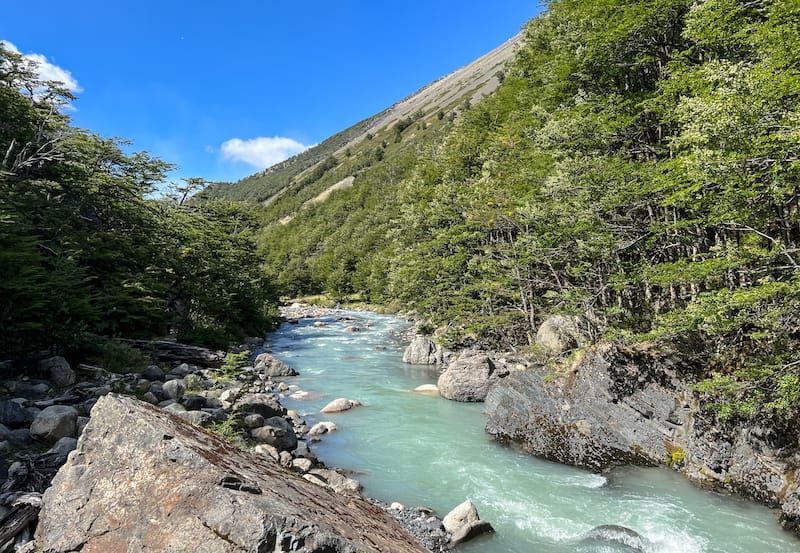
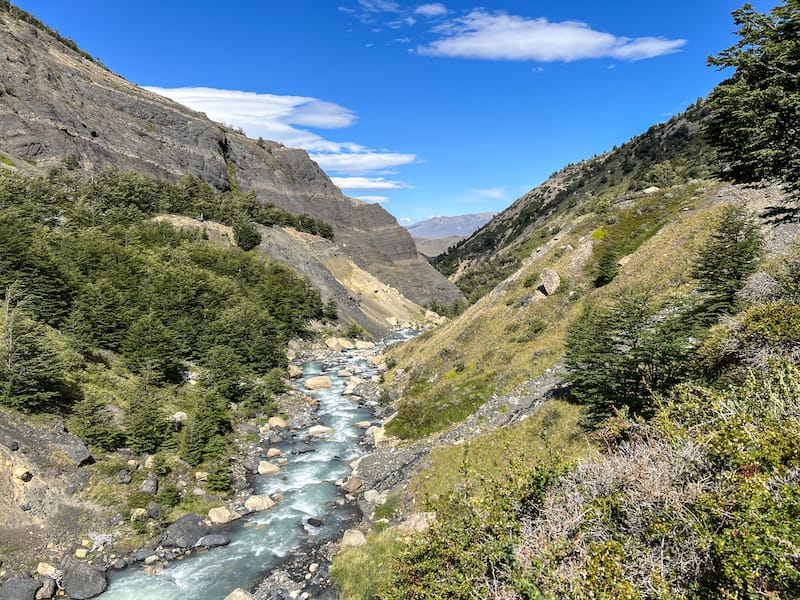
We only stopped for 10 minutes, and it was quite busy, so the opportunity to stock up on supplies was limited. The rest of the middle section of this hike is relatively easy; you will go up and down through a forest.
The best part about this hike is that the valley and the forest protect you from the summer winds and sun. Throughout the forest, your guides will stop and briefly explain the flora and fauna you pass.
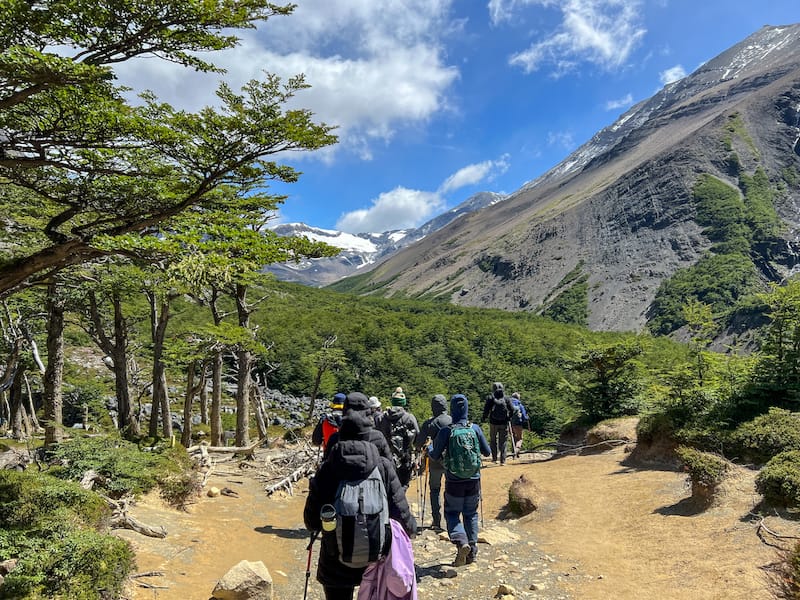
As you reach the end of the forest, you will take a break to eat a little snack and rest your legs before the third section of the hike.
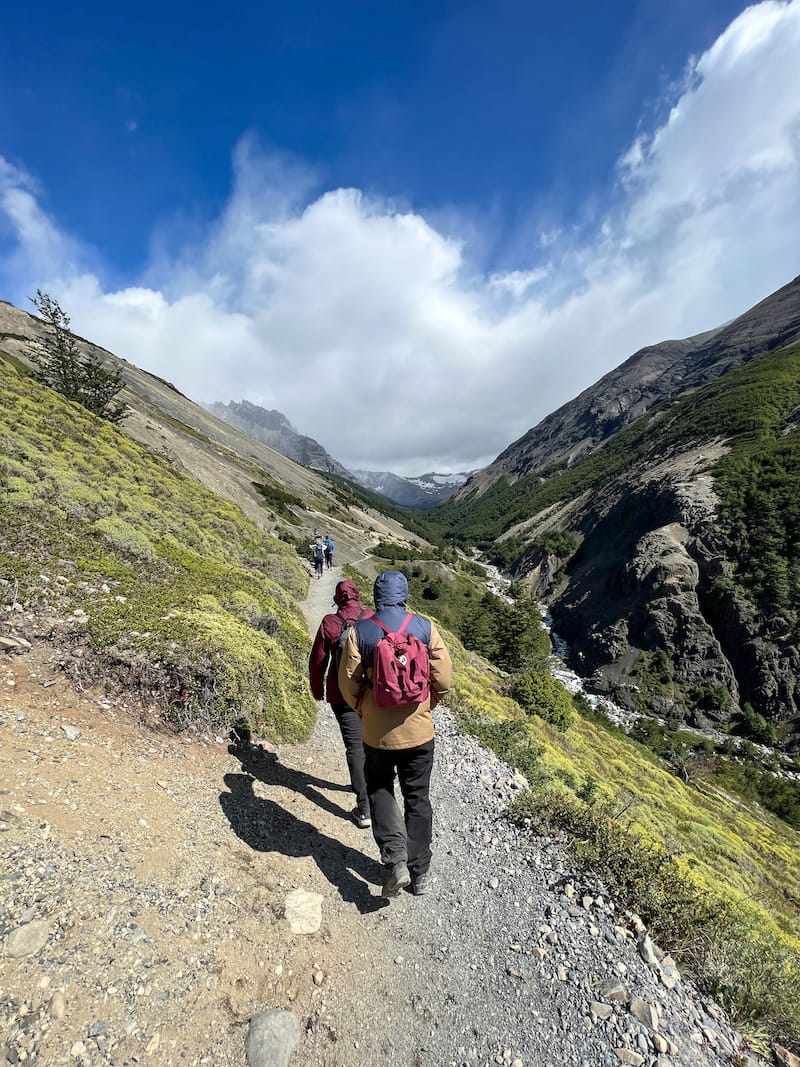
Third Section of the Hike
The ascent to the summit is up there with one of the most challenging things I have done in my life. You will cover a 400 m (1313 ft) incline over a distance of 1 km (0.62 mi).
This may not sound too bad on paper, but it is very challenging. To add to this, you will cover this distance over a rock field left by a glacier. You will need to scramble over rocks on uneven ground and push yourself to the max.
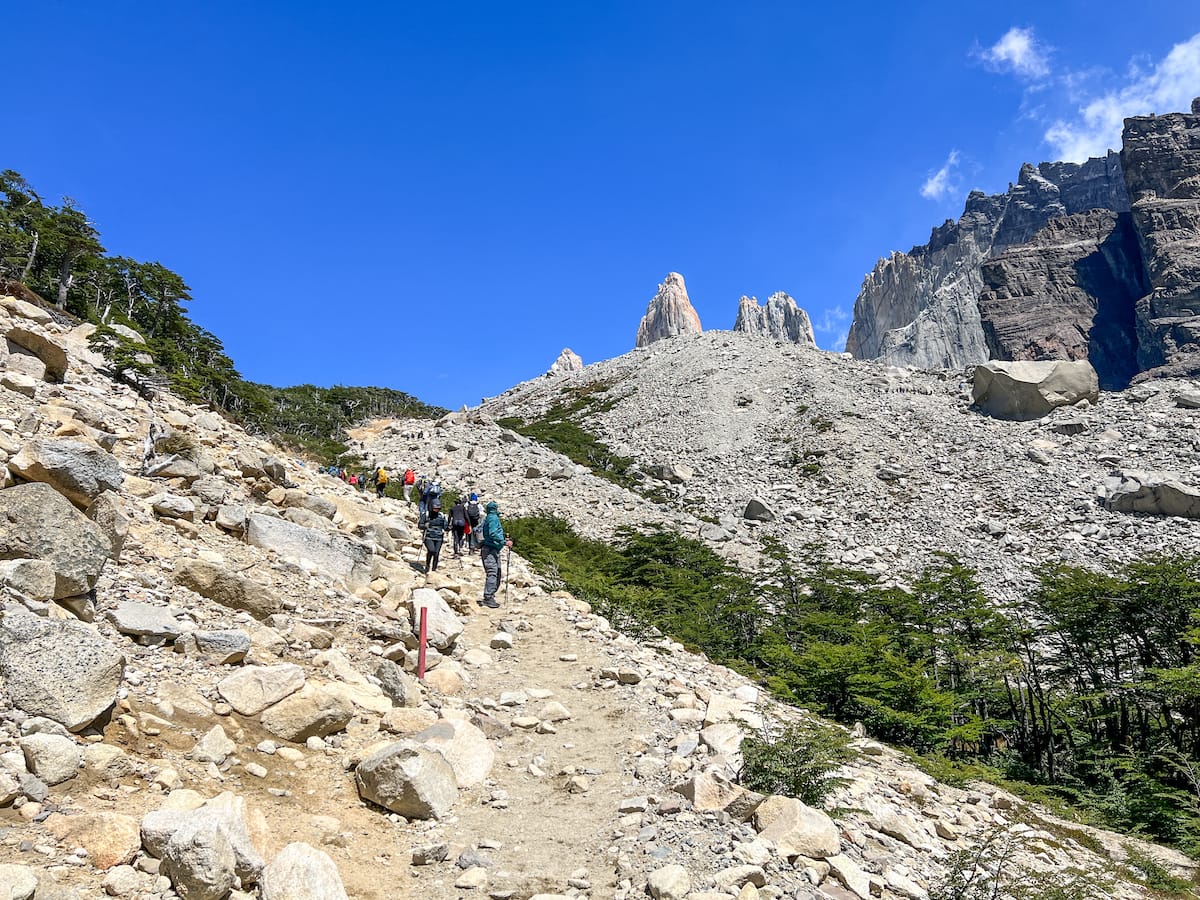
To add to this, you will be battered by the winds, which will fling dirt and rocks at you, which can get quite painful. As I made my way up, I kept thinking I was reaching the top only to be disappointed, as around every corner were more inclines!
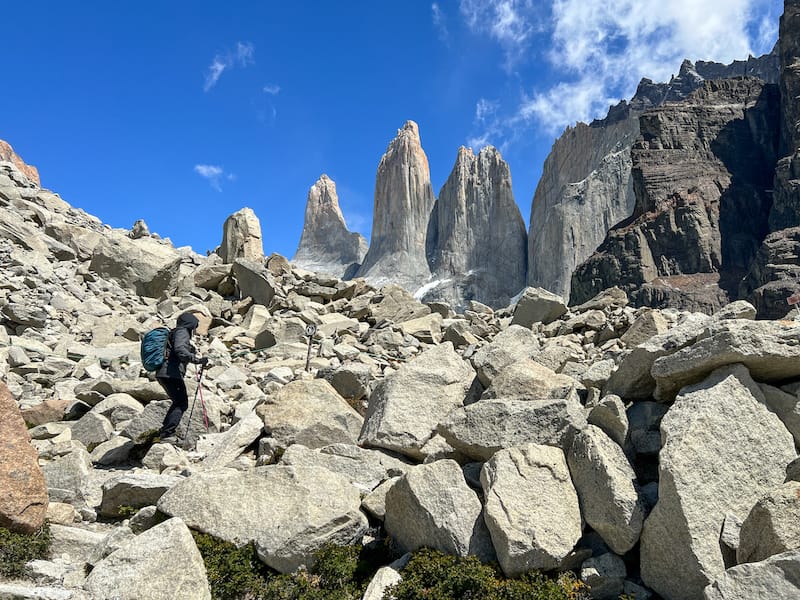
Take your time to complete this section, but once you reach the top, your breath will be taken away by the view and not just the amount of exercise you are doing!
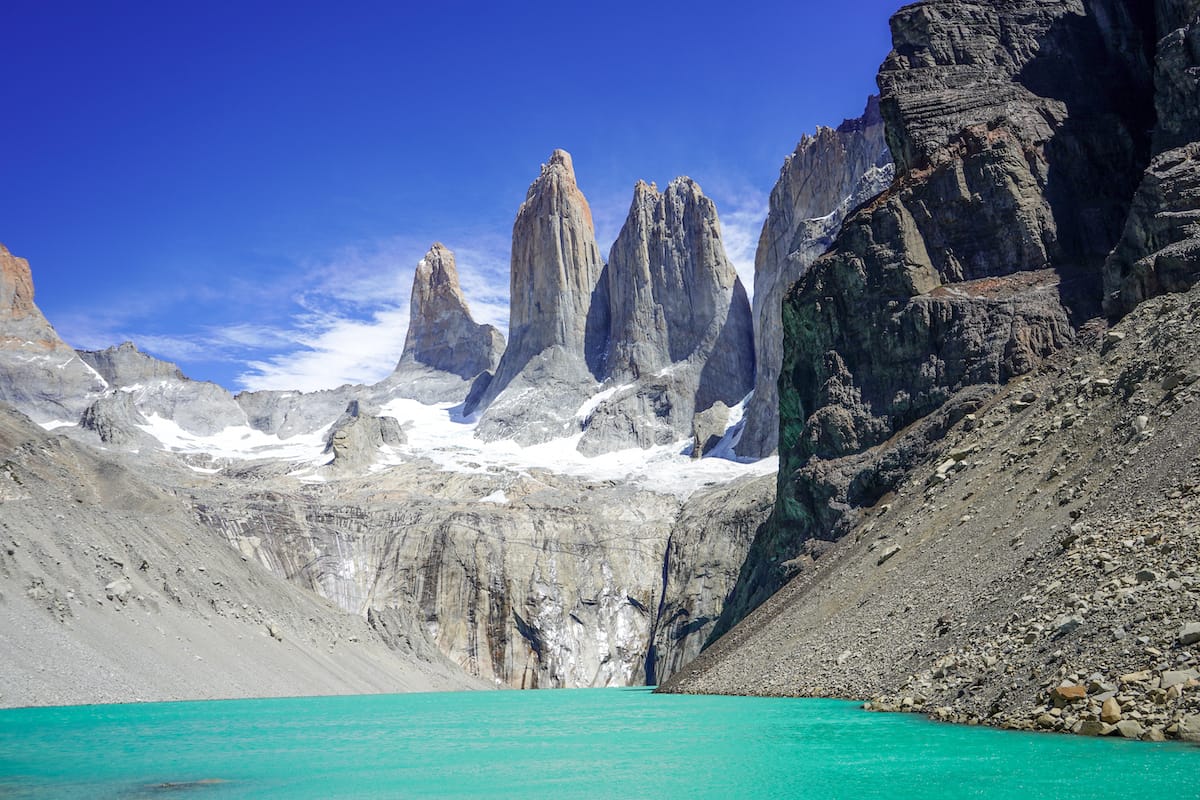
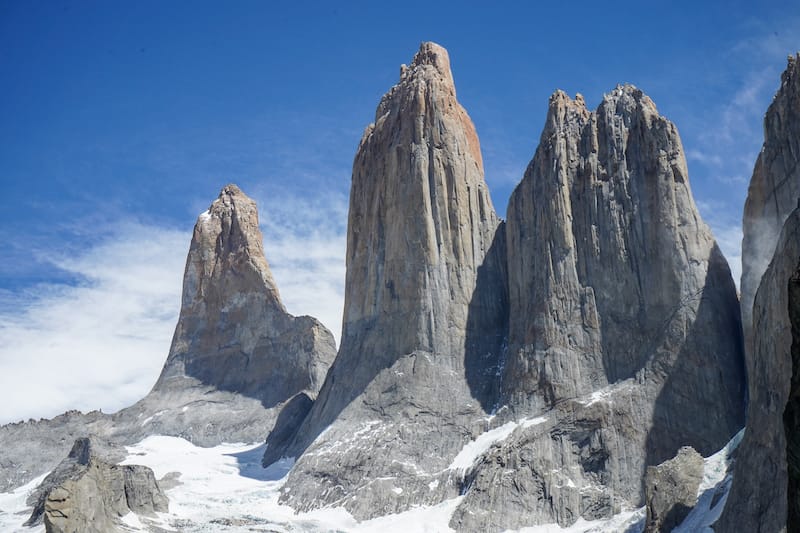
Mirador las Torres
The view at the base of the towers is picture-perfect. You will have a short time to enjoy the views, take pictures, and rest. I wonder about being at the top and taking pictures before sitting down and just staring at the glacial lake and towers.
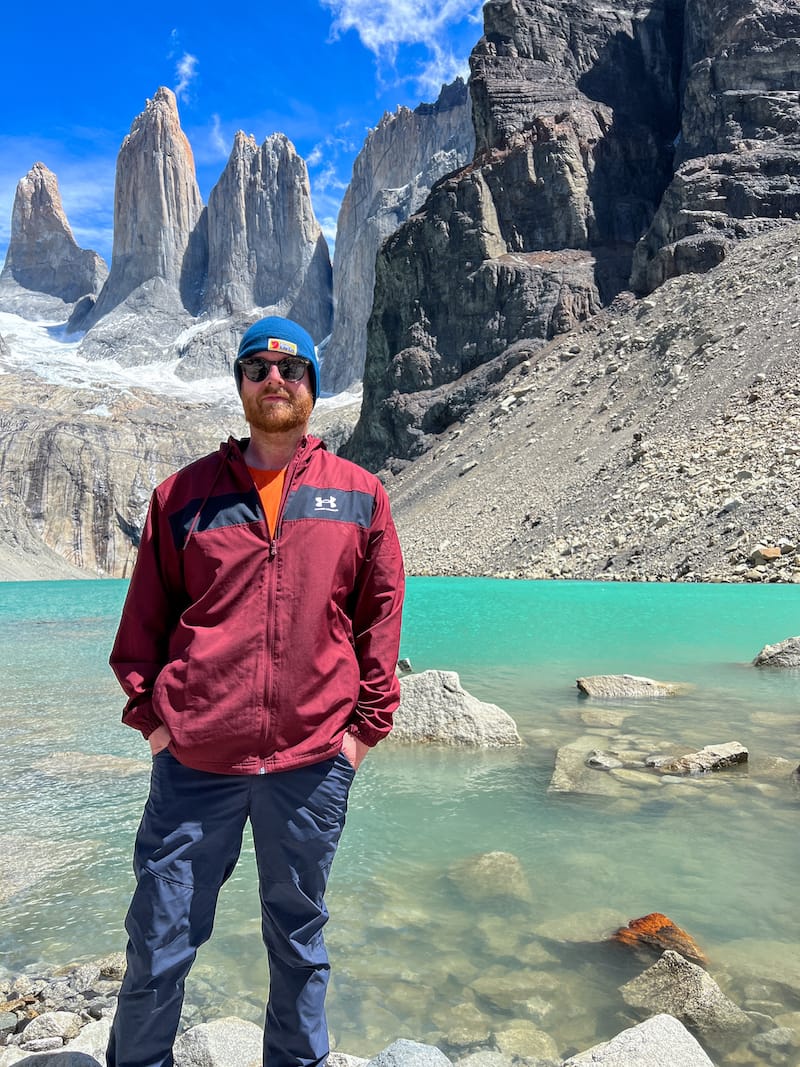
It was truly one of the most beautiful views I have ever seen, and to this day, I can’t quite believe it is real. There are little queues for some of the best photo spots during the high season as people get their photographs taken.
The top is also very windy, so it is advisable not to wear a baseball cap or headwear that is easily blown away. I saw several people lose their hats to the lake.
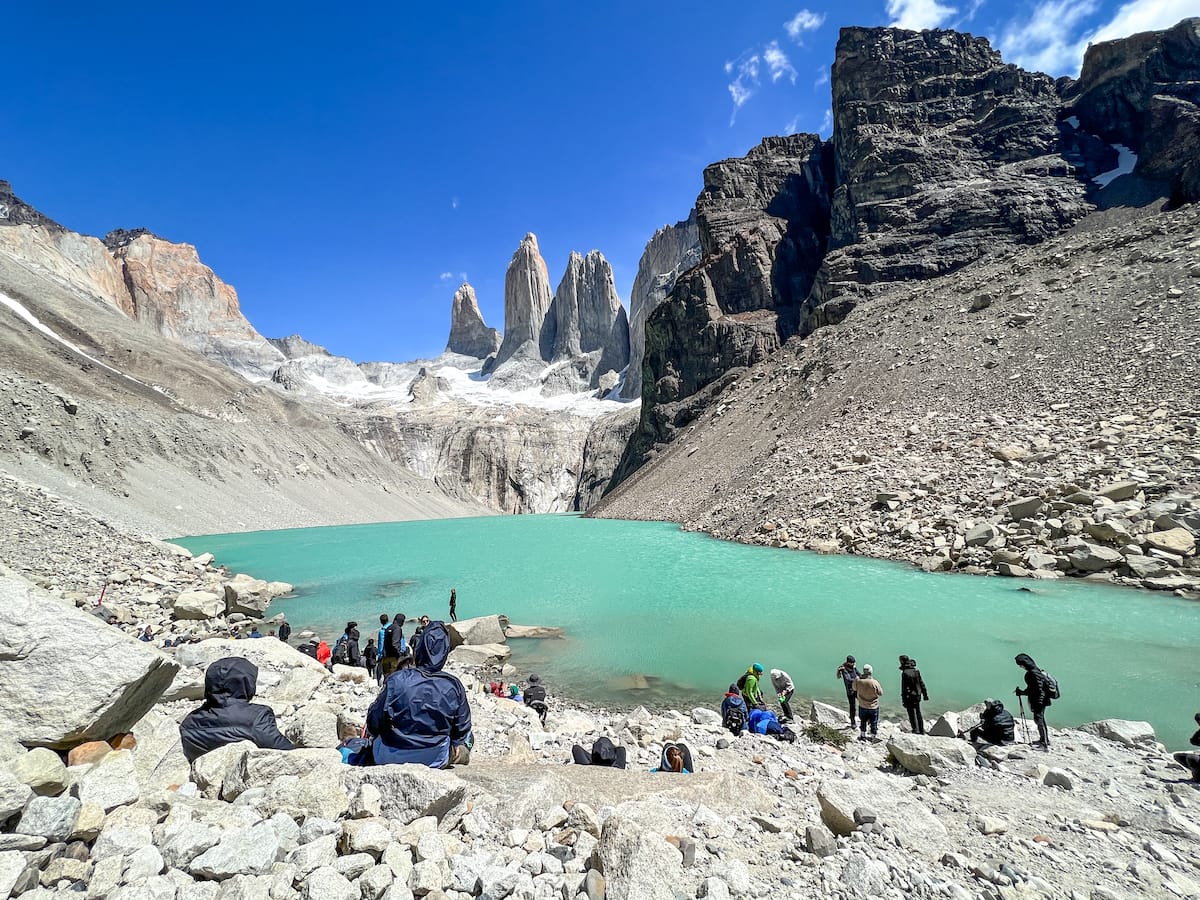
Due to the wind being quite severe and only predicted to get worse, we only spent 20 minutes at the top, but it was enough to enjoy it and have a rest.
The Return
You will follow the same route back down from the summit as you took up. The declines at this point felt far harder than the inclines as my knees and feet started to feel the burn of such a strenuous hike.
Once you have reached the bottom of the glacial field, you will stop for lunch. From then on, the only other big stop is at the refuge again to use the toilet and refill water bottles.

On our tour, we had to hike a little past where we initially got dropped off. By this point, the group was very spread out; it was a little hard to know the route. If you are unsure, I would wait for a guide to catch up so you know where to go.
Once you reach the vans, you can relax and sleep until the others catch up before heading back to Puerto Natales.
Option 2: Hiking to The Base of The Towers On Your Own
If you do not want to do the hike as part of a tour, you can choose to rent a car or use public transport to get to the hiking area and complete the trek.
Here is some useful information for those wanting to do this hike on their own.
Cell Service
There is no (or hardly any!) cell phone service in the park. I used a Chilean SIM card and still had no service throughout the park.
This is great for disconnecting from the rest of the world, but those traveling alone should let someone know they are there and when to expect them back.
Time Your Hike Properly
The tail is not open all day, and the summit is closed from 4.30 pm on. You will need to plan your route accordingly and make sure you leave enough time to reach the summit before it closes.
Rangers will inform you along the way if you do not make it to the summit. While 4.30 pm is the standard closure time for the summit, bad weather will close it early.
Public Transport From Puerto Natales
Given how expansive and sparsely populated Patagonia is, the bus connections are not great. To get to the start of the hike, you will first need to take a bus to the Torres del Paine National Park welcome center at Laguna Amarga.
From there, it is still another 7 km (4.35 mi) to the Hotel Las Torres. Thankfully, there is a shuttle service from the welcome center to the starting point.
The shuttle costs around $4500CLP ($6 USD), which can be paid directly to the driver.
The bus from Puerto Natales to Laguna Amarga takes 2 hours and runs 5 times a day: 6:45 am, 7 am, 12 pm, 2:30 pm, and one at 6 pm. If you are looking to do the hike as a day trip, you will need to take the 7 am bus at the latest. Please note that these times are for the busiest season (there are fewer routes in shoulder season).
The bus returns to Puerto Natales at the following times at several hours throughout the day (most of them in the afternoon).
The bus journey costs $15,000 CLP ($16 USD) each way; tickets can be bought online from the bus company, Big Sur.
Renting a Car in Puerto Natales
When we travel, we always book our cars through Discover Cars. They offer a great range of rental cars from several different providers. The cars are always reliable and offered with either manual or automatic transmissions!
You can also book full coverage directly through Discover Cars.
Hiking Route
The hiking route does not differ from the one taken by tours, and you can follow the details provided above.
The advantage of doing it on your own when you have a car is that on the way back, you can take your time to enjoy a drink and a hot meal at the refuge.
Torres Del Paine Day Hike + Tours FAQ
When is the best time to hike to the base of Torres del Paine?
The trail is open all year; however, the conditions under which you will complete the hike are vastly different!
The most popular time to complete the trek is the Patagonian summer, between December and February. During this time, the days are long and the weather is generally sunny.
The downside of completing the hike during this time is that it can be very windy and crowded on the trail. I completed the hike in early January, and the route was very busy.
Winter in Patagonia, from July to September, brings snow and ice, and the hike becomes far more challenging and may require ice spikes or snowshoes to be able to complete it.
During this time, fewer people are trying to complete the hike. Days during this time of year are much shorter, so you will be a little more rushed to complete it. Spring and fall are also much less busy, but the weather is unpredictable.
Throughout the year, there is a chance that the final section up to the towers could close due to adverse weather conditions. So, be sure to check the trail conditions beforehand!
Do you need a ticket to visit Torres del Paine?
Yes! No matter how you plan to visit Torres del Paine, you will need to purchase a ticket in advance. It is $32,400 CLP (about $34) for foreigners and good for 3 days. If you need a 7-day pass, it is $46,200 CLP (about $48).
If you do not purchase one in advance, you will have to buy one when you reach the park, and this can slow down your day, especially if you are traveling during the summer when there are large crowds of people looking to enter the park.
It is important to note that even if you are on a guided tour, you will need to purchase a ticket. Click here to purchase your Torres del Paine National Park ticket.
How do you get to Torres del Paine from Puerto Natales?
There are two ways you can visit Torres del Paine and complete the Mirador las Torres hike. You can do it either as part of a tour or by visiting on your own.
I joined a guided tour to complete the hike, as this was the best option for me, as I was doing the hike on my own and I felt like I needed the motivation of being part of a group to complete it.
Many people also complete the hike on their own, and it is very easy to do so as it is well-marked and trafficked.
If you are driving through, it is important to note that the hike is pretty strenuous, and if you cannot split the driving with another driver, it might be worth spending the night in the area.
Is it worth doing the Torres del Paine day hike?
Yes! This was one of the hardest and most rewarding things I have ever done. I was very nervous before doing the hike, as I had seen a lot of people say how hard it was.
While it was hard, it was worthwhile, and I will remember it for the rest of my life.
Who shouldn’t do the Mirador las Torres day hike?
This hike is hard; it will push you to your limits, and if you are not normally very active or used to walking and hiking long distances, it may not be for you.
If you are of relative fitness with no underlying health problems, you should have no issue completing it. However, I would do this hike when you have nothing planned the following day, as you will be very sore the next day.
I flew back to Santiago the next day, could barely bend my knees, and learned all about a condition called hiker’s knee!
What should you bring with you for the day?
You will need to bring a backpack full of snacks, your lunch, and drinks. I took a range of snacks, a packed lunch, water, and some juice boxes.
I got through my food and drinks probably far too quickly and could have done with bringing some more with me. Here are a few other things I recommend taking:
- Sunscreen – a lot of the trail is relatively exposed, and you can get burned without realizing it.
- Trekking poles – the trail is challenging, and they will come in use at several different points of the trail, especially for keeping your balance on the windy passage. As part of my tour, I was given trekking poles.
- Sunglasses – it gets pretty sunny at times, and it is worth having a pair of shades on you.
What should you wear?
This trail is demanding, and I saw so many people hiking it in inappropriate clothing, and they looked miserable. Your clothing needs will change depending on what season you are planning to do it in.
Here is my advice on clothing for those of you planning to do it during the summer, which is likely the majority of people reading this post.
First of all, you will need to wear clothes in layers that can be easily removed. The weather changes quickly, and you will want to be able to change easily.
- Windproof jacket – the wind is brutal and a windproof coat is essential
- Hiking boots/hiking shoes – a sturdy pair of hiking boots or hiking trainers is a must. The ground is not always easygoing or firm.
- Hats – I would take both a baseball cap and a woolly hat. The temperatures wildly fluctuate, and you will want a warm hat at the summit. Along some of the sections, you cannot wear a baseball cap as it is too windy.
Should you do the Base of Torres del Paine day hike?
If you are not planning to do the W or O treks, then absolutely do this day hike!
The experience will last with you for a lifetime, and I think it is one of the most rewarding hikes you can do outside of the major multi-day hikes.
If you are doing the W or O treks, you will complete this hike as part of those circuits, so there is no reason to book an extra day trip to complete it.
Did I miss anything about hiking to the base of Torres del Paine? Let me know in the comments!
More Chile Travel Guides
- Things to do in Puerto Natales
- Things to do in Punta Arenas
- Magdalena Island penguins in Patagonia
- How to see King Penguins from Punta Arenas